Are you looking to take your woodworking skills to the next level? With a coping saw, you can easily master some of the most difficult cuts and joinery techniques. 91% of professional woodworkers prefer using a coping saw for intricate cutting tasks.
This article will discuss the benefits of using a coping saw, different types available, basic and advanced techniques for using one, common mistakes to avoid, safety tips, and examples of projects you can create with it.
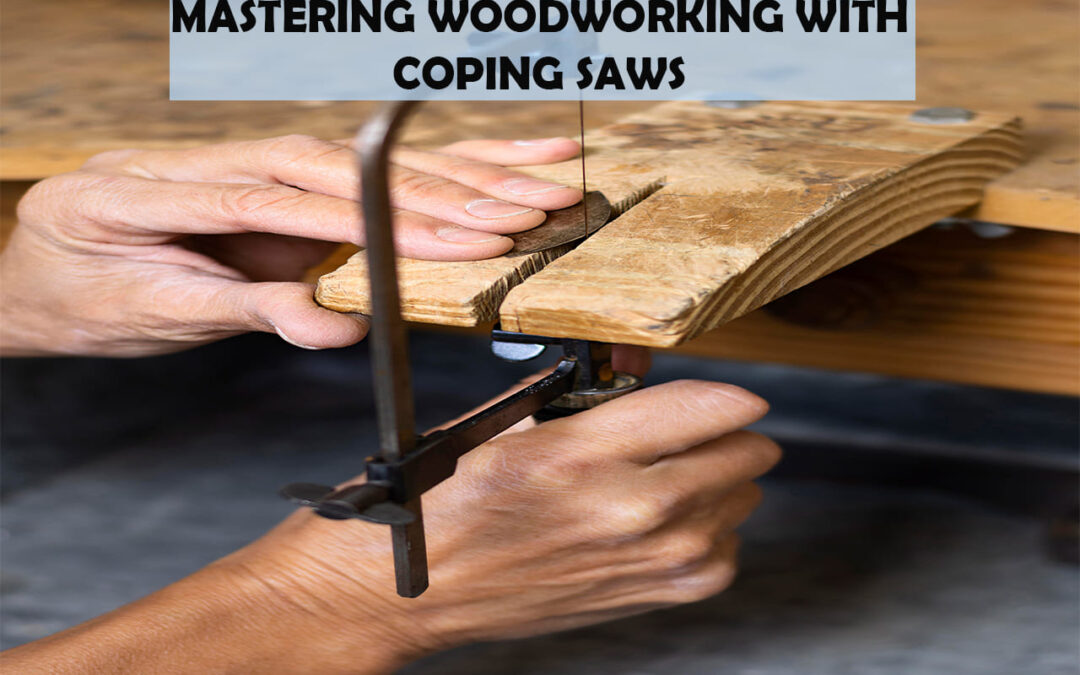
Let’s get started on mastering woodworking with a coping saw!
Key Takeaways
- Coping saws are the preferred tool for intricate cutting tasks by professional woodworkers.
- They are versatile and can be used for cutting intricate shapes, curves, and angles into wood.
- Coping saws offer accuracy and allow for precise cuts without overcutting or damaging the material.
- They are lightweight, portable, and cost-effective compared to other power tools.
What is a Coping Saw?
Have you ever wondered what a coping saw is and how it can help you with woodworking?
A coping saw is a hand-held saw that consists of a thin, sharp blade held in tension between two metal pins. The blade has teeth on one side only. This type of saw is used to cut intricate shapes, curves, and angles into wood. It can also be used for precision cutting when sharpening blades or creating joints in furniture pieces.
Coping saws are great for making curved cuts around curves or cutting angles in tight areas that other larger handsaws simply cannot reach.
The main benefit of using a coping saw for woodworking is the accuracy it offers when cutting intricate patterns or shapes into your workpieces. With its small size and adjustable blade tension, it allows you to make precise cuts without worrying about overcutting or damaging the material being worked on. Additionally, the ability to change out different blades makes it easy to switch between tasks quickly and efficiently.
Overall, having a coping saw as part of your toolkit gives you an invaluable tool that will prove useful time and time again when working with wood materials. Being able to cut out intricate designs with ease makes this small yet powerful tool worth its weight in gold for any serious woodworker. And given its reasonable price tag, adding one to your collection should be an easy decision! To maximize its potential though, it’s important to use the right technique and maintain good blade sharpness – then you’ll be sure to get the most out of your new coping saw! Moving forward we’ll look at some tips for getting started with this useful tool.
Benefits of a Coping Saw
Using a coping saw can give you endless possibilities for creative projects! It’s an incredibly versatile tool that provides a high degree of precision when cutting intricate shapes and angles. With its ability to adjust the blade tension, it can cut through various materials with ease, making it ideal for repairing blades or sawing angles.
Here are some of the major benefits of using a coping saw:
- Precise cuts: A coping saw is designed to make clean, precise cuts with minimal effort.
- Versatility: You can use it to cut multiple types of wood and other materials.
- Adjustable blade tension: This allows you to customize your cuts according to different material thicknesses.
- Lightweight design: Coping saws are lightweight and easy to take on the go, great for those who need portability in their tools.
- Cost-effective: Compared to other power tools, coping saws are relatively inexpensive while still providing excellent results.
These features make the coping saw an invaluable tool for any woodworker looking for maximum control over their project without sacrificing accuracy or detail. Plus, because they’re so easy to use, even beginners can quickly learn how to get great results from a coping saw – making them perfect for anyone looking to start tackling more complex projects in their workshop!
By understanding the advantages that this type of tool provides, you’ll be able to better determine if a coping saw is right for your needs as you move forward with your next project.
Types of Coping Saws
With so many different types of coping saws on the market, you’ll be sure to find one that fits your needs like a glove!
The two main categories are regular and Jew’s harp coping saws. Regular coping saws usually feature a blade that is held in tension by a U-shaped frame with two handles. The blades typically have 13 to 15 teeth per inch, making them ideal for cutting curves or intricate shapes.
Jew’s harp saws feature three sides and an adjustable blade, making them great for profiling edges and changing blades quickly. They also have more teeth per inch than regular coping saws—usually between 16 and 20—for smoother cuts in hardwoods.
Both types of coping saw come with various handle designs which allow users to comfortably make delicate cuts without fatigue. Additionally, some models include features like swivel frames for increased control when working at awkward angles or on complex pieces of woodwork.
All in all, there’s no shortage of options when it comes to choosing the right type of coping saw for your project.
No matter which type you choose, understanding how it works will help ensure success with any kind of woodworking project. Knowing basic techniques such as proper grip and posture will give you greater control when using the tool while familiarizing yourself with concepts like kerf width and profiling teeth will help you achieve neat results every time.
With this knowledge in hand, your next woodworking endeavor is sure to be a success!
Basic Techniques for Using a Coping Saw
Using a coping saw to make precise cuts is an essential woodworking skill. It’s important to choose the right blade, apply steady pressure as you cut, and use the saw for straight cuts. With practice and attention to technique, you’ll soon be able to master all your woodworking projects with a coping saw!
Choosing the Right Blade
Choosing the right blade for your woodworking project can make all the difference in achieving a successful outcome. It’s important to be aware of the cutting angles and blade depth of your coping saw, as these will determine how well it works on different types of wood.
If you’re using thicker wood, choose blades with more teeth per inch, as they’ll cut slower but provide a cleaner finish. If you’re working with thinner materials such as plywood or particle board, select a blade that has fewer teeth per inch; that’ll allow for faster cutting without sacrificing accuracy.
The key is to find the right balance between speed and precision while keeping in mind the type of material you’re cutting. Understanding how different blades function will give you greater control and help ensure that your finished product looks professional.
With careful consideration of these factors, you’ll be ready to move on to applying pressure to the blade to get perfect results every time!
Applying Pressure to the Blade
Now that you have the right blade for your project, it’s time to apply pressure to the blade. This is essential to make sure the saw cuts through wood quickly and accurately.
When using a coping saw, hold tension on the blade at all times by keeping your grip tight and steady while guiding it. You should also be aware of maintaining a consistent angle with the blade against the material you’re cutting.
Keeping these rules in mind will help ensure clean, precise cuts every time. Once you master applying pressure to the blade, you’ll be ready to move on and learn how to use your coping saw for straight cuts.
Using the Coping Saw for Straight Cuts
Gaining control of the blade is essential for making straight cuts with a coping saw. To achieve this, make sure that the blade is secure and that there are no obstructions in its path.
Keep your hands steady and use sanding tips to help keep the saw from slipping as you work. It’s also important to maintain your saw’s blade by regularly cleaning it and sharpening it as needed.
Finally, take your time cutting – don’t rush the process! A slow, steady pace will create more accurate results and reduce the risk of mistakes or accidents. With patience and practice, mastering straight cuts with a coping saw can become second nature – setting you up nicely for tackling curves in subsequent sections.
How to Cut Curves with a Coping Saw
Cutting curves with a coping saw can be tricky, but with practice and the right technique, it’s possible to achieve professional results. Just ask Joe, who recently crafted an intricate wooden shelf full of curved edges.
To do so, you’ll need to fine-tune your blade adjustment, find a comfortable grip for your saw handle, and make sure that the blade is going in the correct direction.
Using a coping saw can create even more intricate cuts than other saws due to its ability to cut tight curves with ease. The key is adjusting the tension on the blade so that it has enough give to easily glide along any curve without becoming too loose or too tight.
When cutting curves with the coping saw, always remember to use slow and steady pressure while making sure your hands are firmly gripping both sides of the handle. This will help ensure that you get an accurate cut each time.
It’s also important to keep in mind which direction you want your cut lines to go and adjust accordingly before starting. If done correctly, one pass should be all you need when cutting curves with a coping saw. However, if needed, feel free to take multiple passes for greater accuracy as long as you’re careful not to damage any wood grain in the process.
With these tips in mind, creating complex shapes out of wood will become easier and more enjoyable over time!
To make intricate cuts like those seen on Joe’s shelf requires some extra finesse, but it is achievable if done carefully and patiently. Just take your time and don’t rush!
Making Intricate Cuts
Creating intricate cuts can be intimidating, but with a little practice and patience, you’ll be able to make beautiful pieces in no time! When using a coping saw for making tight turns and cutting intricate shapes, it’s important to keep the saw blade perpendicular to the surface of the wood. This will ensure even pressure on both sides of the cut and create a smooth line.
To make sure your cuts are precise, use a ruler or straight edge as a guide when cutting along curves or angles. It’s also helpful to use masking tape or painter’s tape to adhere to the template firmly before starting each cut.
To cut accurately around curved edges, hold the saw frame at an angle that best suits the curve of your template. Be sure not to twist or rotate your wrist while cutting – that’ll cause unevenness in your cuts. For tighter turns, slowly move back and forth until you reach your desired shape. As with any woodworking project, take your time and don’t rush through any step. With some practice and patience, you’ll soon master making intricate cuts with a coping saw!
To further hone these skills, using a coping saw for joinery is next on the agenda. Joining two pieces of wood together requires precision and accuracy to create clean lines without gaps or overlaps between them.
Using a Coping Saw for Joinery
Making perfect joins with a coping saw takes some serious skill – you’ll be amazed at the masterpieces you create! To join wood correctly with a coping saw, there are several steps to follow:
- Mitering corners for precise measurements.
- Cutting away excess material for accuracy.
- Sanding edges to achieve smoothness.
Using a coping saw is an excellent way to make intricate joints and cuts that wouldn’t be possible with other tools. It’s important to pay attention to detail when operating the coping saw; taking your time will ensure clean and accurate miters on each corner, as well as removing only the necessary material for an exact fit.
After cutting, it’s also important to use sandpaper or another abrasive tool to smoothen out any rough edges before putting it all together. With patience and practice, you can become an expert in no time! As the saying goes: measure twice, cut once!
Avoiding common mistakes is key – if done right, you’ll have beautiful joinery every time.
Common Mistakes to Avoid
If you’re trying your hand at joinery, it’s important to be aware of the common mistakes to avoid.
One of the most frequent errors is cutting too deep with a coping saw. This can cause splintering and weaken the joint, compromising its structural integrity. When using circular saws or power tools, it’s easy to get carried away and cut beyond the required depth; however, with a coping saw, that mistake is much harder to make since you have more control over how deep you cut.
Another common mistake is not taking into account the grain direction when cutting joints. Always consider the type of wood before starting work as this will determine which way you should cut for maximum strength and support in the joint. Failing to consider this could lead to an uneven finish or an unstable piece of furniture.
Finally, when marking outlines with a pencil, use light strokes so they don’t show up too prominently on finished pieces; otherwise, it’ll ruin their aesthetic appeal. It’s also wise to double-check measurements before beginning any cuts as even small miscalculations can render a project useless if not caught in time.
With these tips in mind, safety should be your next priority when working with woodworking tools such as coping saws.
Safety Tips
Now that you’re aware of the common mistakes to avoid when using a coping saw, let’s take a look at some safety tips to ensure your woodworking experience is as successful and risk-free as possible.
First and foremost, make sure you always sharpen your blades before working with a coping saw. Dull blades can cause friction in the cut, resulting in an unsteady finish or even worse, splintering of the material being cut.
Additionally, it’s important to wear eye protection when working with any type of power tool since dust and particles can easily be kicked up during use.
To ensure your work area is safe for both yourself and others, make sure all tools are stored properly or put away after each use to avoid tripping hazards. Keep tools organized and out of reach of small children if possible.
Lastly, be mindful of where you place the pieces that have been cut, as these sharp edges can pose a potential danger if touched without proper protection.
By following these steps, you’ll be able to stay safe while woodworking with a coping saw, improving your overall experience by allowing more time for creativity rather than worrying about injuries or accidents due to improper safety precautions.
With this knowledge under your belt, it’s time to move on to discuss examples of projects you can create with this versatile saw!
Examples of Projects You Can Create with a Coping Saw
You won’t believe the eye-popping projects you can create with a coping saw! Whether you’re a beginner or an experienced woodworker, this tool is incredibly versatile and allows users to craft intricate designs.
From creating decorative frames and edges on furniture pieces to making DIY furniture from scratch, the possibilities are endless. Even if your project requires more complex shapes, the coping saw is up to the task. With its thin blade and tight turns, it’s great for cutting out curves in wood boards as well as making precise cuts along internal corners.
The best part about working with a coping saw is that it’s easy to learn how to use one properly. Beginners can start by practicing basic straight-line cuts on scrap wood, then progress onto more curved shapes. As long as you take safety measures such as wearing protective eyewear and keeping your fingers away from the blade, using a coping saw is relatively simple.
To ensure accurate results, make sure your blade is sharpened before starting any project – dull blades will cause jagged edges that ruin even the most beautiful of wooden objects.
When used correctly, a coping saw can easily cut through both thick hardwoods and soft pine lumber alike – perfect for crafting everything from birdhouses to outdoor benches! Plus, once you get comfortable with this tool, there’s no limit to what kind of gorgeous DIY projects you can create for yourself or others.
So don’t wait any longer – grab your saw and start building something truly special today!
Conclusion
You now know the basics of using a coping saw and how to use it for joinery. With practice and patience, you can create stunning woodworking projects with a coping saw.
Remember, “The devil’s in the details” – pay attention to small things like angles and cuts, so your projects look professional.
Have fun mastering this skill and enjoy all the beautiful pieces you create!
Frequently Asked Questions
How much does a coping saw cost?
A coping saw typically costs around $10, but can range from as little as a few dollars to over $50 depending on blade type and saw shape. They accept alternative blades allowing for greater versatility.
What type of coping saw is best for beginners?
For beginners, a coping saw with a thin blade and adjustable tension is best. Sharpening techniques and proper saw maintenance are necessary for clean cuts.
What kind of blades are compatible with a coping saw?
A coping saw blade is a thin metal blade, usually with teeth on one side. To sharpen it, use a file or sharpening stone to restore the cutting edge. Make sure to keep the angle of your blade consistent when sharpening.
Is a coping saw suitable for cutting metal?
No, a coping saw is not suitable for cutting metal. Its small blades are designed to cut wood quickly, but the cutting speed and blade choice required to cut metal make it ill-suited for this task.
Are there any special tools needed to use a coping saw?
You’ll need a protractor to measure angles and a sharpening stone to maintain the blade’s sharpness. Other than that, all you need is the coping saw itself.