Cutting with a router can be intimidating, but it doesn’t have to be. With the right bit and a few simple tips, you can master the art of precision cuts in no time – like a hot knife slicing through butter!
In this article, we’ll show you how to:
- select the ideal router bit
- prepare your table
- practice your technique
- maintain an even speed
- set the depth
- make plunge cuts
By following these steps, you’ll soon be cutting clean and precise lines with ease.
Key Takeaways
- Router bit selection is important and should consider factors such as material and desired outcome, shank size, and cutter length.
- Proper router table preparation is crucial and involves choosing a compatible, adjustable, and durable fence, as well as securely fastening the router plate to prevent kickback.
- Safety should always be a priority and includes using high-quality tools, wearing safety equipment such as eyewear, gloves, and a dust mask, and double-checking alignment and clamps.
- Cutting techniques should be mastered for clean and precise cuts, which include proper alignment, calibrating bit depth, adjusting router speed, securely positioning wood, using a push block for stability, and wearing a dust mask for protection.
Select the Right Router Bit
Selecting the right router bit is essential for achieving clean, precise results. When choosing a router bit, it’s important to consider the type of material you’re cutting as well as the desired aesthetic outcome.
There are several different types of bits available that range from straight cutters to dovetail joinery cutters. Each type of router bit has its unique characteristics and should be chosen based on your project needs.
It’s also important to consider factors such as shank size and cutter length when selecting a router bit. These factors can have a significant impact on how well the cut will turn out and can help ensure precision cuts every time.
Additionally, it’s always best practice to use sharp router bits for the best performance and safety purposes.
Once you’ve chosen the correct router bit for your project, you’ll be ready to move on to preparing your workpiece and setting up the router table correctly for optimal performance.
Prepare the Router Table
To prepare your router table correctly, you need to choose the right fence and the correct router plate. A fence helps keep your workpiece stable as you move it across the router table, while a router plate allows for easier access when making adjustments.
Selecting both of these components carefully will ensure that you get the most accurate cuts possible from your router table.
Choose the right fence
Choosing the right fence for your router is key to achieving precise cuts. When selecting a fence, consider the following:
1) Its compatibility with your router.
2) Its adjustability and durability.
3) Precision of setting.
The chosen fence should fit precisely on the router table and be adjustable in both directions. Fences that aren’t adjustable can lead to inaccurate results, so make sure they’re able to be adjusted as you need them.
Additionally, choose a fence that has a speed rating equal to or greater than your router’s maximum speed. Doing so will ensure that the cutting action is smooth and efficient when using higher speeds.
Lastly, always check for accuracy when making adjustments by verifying measurements with a ruler or spirit level before each cut. This will guarantee optimal accuracy and make sure you get clean and precise cuts every time.
With the right tools in place, you’re ready to move on to choosing the correct router plate.
Choose the correct router plate
Once you’ve chosen the right fence, you’ll need to pick a router plate too. When choosing a router plate, it’s important to consider factors like the size and shape of your piece of wood, as well as the speed and accuracy with which you want to work. Safety should always be your top priority; check for sharp edges on plates that are already in use and opt for ones with rounded edges wherever possible.
Make sure that the plate is securely fastened before starting any cuts, as this will prevent kickback – an all-too-common risk when routing. Additionally, make sure to read manufacturer instructions carefully before using new plates or bits of equipment, so that you can familiarize yourself with their safety precautions.
With these tips in mind, you’ll be ready to take your routing skills to the next level—it’s time to practice!
Practice Makes Perfect
Perfecting your router techniques takes time and patience, but with enough practice, you’ll be cutting like a pro in no time! To get there, here are three key elements to help you achieve success:
- Practice safely: Make sure that your workspace is safe and organized before beginning any project. This means clearing the area of any mess or items that can be tripped over and setting up a dust collection system to reduce debris.
- Choose the right tools: Selecting high-quality tools for the job will make it easier to work with precision and accuracy. It’s important to pick an appropriate router bit size for the type of material being cut and opt for one with carbide teeth if possible.
- Keep practicing: The more experience you gain, the better your results will become. Consider trying different types of cuts such as rabbets or dadoes as this will help sharpen your skills even further.
Although mastering router techniques takes effort, it pays off in terms of clean and precise cuts once achieved – so keep at it! With these tips in mind, let’s take a look at how we can make sure our router bit is sharp before starting any project.
Make Sure the Router Bit is Sharp
Practicing with your router is essential to ensuring that you make precise and clean cuts, but even the most experienced woodworker can be let down by a dull bit. To ensure that you’re getting the best possible cut each time, it’s important to make sure your router bits are sharp.
Regularly sharpening router bits will help them maintain their edge and stay sharper longer. There are many tools available specifically designed for sharpening router bits, such as diamond stones and honing guides. Additionally, cooling lubricants like oil or wax should also be used when sharpening to keep the blade cool during use and prevent overheating.
When using the sharpening tool of your choice, make sure to hold it at an angle that matches the original shape of your router bit – otherwise, you could potentially damage it beyond repair. Move the tool slowly across the cutting edges in one direction only while applying light pressure until it reaches a razor-sharp finish. It’s important not to rush this process as it takes time and patience to achieve perfection! Be sure to check on your work frequently so that you don’t over-sharpen any part of the bit.
With some practice, you’ll soon be able to produce perfectly shaped edges each time without having to worry about how sharp your router bits are.
By taking care of your tools through proper maintenance like regular sharpening, you’ll have peace of mind knowing that each cut will be precise and accurate – avoiding costly mistakes in the future. To get set up for success with every project, start by making sure all necessary components like routers and bits are in tip-top condition before starting work; sharpen those blades! This way, when it comes time for cutting operations, everything runs smoothly with minimal effort on your part – resulting in beautiful projects every time!
Set the Router Bit Depth
Having the right router bit depth is key to getting great results on your projects! Before you begin routing, make sure to set the speed on the router. You should also adjust the depth of the cut to match your project’s needs.
To do this, use a combination square and place it against the side of your router bit. Ensure that it’s parallel with both sides of the bit, and then measure down from the top edge of the bit to get an accurate depth reading. Make sure that you double-check all measurements before setting them into place.
When setting depth, keep in mind the type of project you’re working on as well as what material you’re cutting through. If you’re cutting through hardwood or other dense material, you’ll need more support than if cutting through softwood or plywood. Adjusting these settings may feel like an extra step, but taking some time now can save time and frustration later on in your project by providing precise cuts every time!
Securing material properly is essential for a successful cut since even small movements can result in uneven edges or poor finish quality. Be sure that any material is clamped securely so it doesn’t move while routing; otherwise, a dangerous kickback could occur when the router bit comes in contact with moving material and causes serious injury. Taking care when securing materials before routing will help ensure clean lines and professional-looking results every time!
Secure the Material
Secure your material firmly before routing to ensure safety and stunning results! Before you begin, align the material with the router bit and check if it’s stable. This is essential for a successful cut. It’s important to consider how thick or thin your material is, as well as its size. If it’s too large, use clamps or a jig to hold it in place.
When using clamps, remember that any pressure can cause movement when routed, so use them sparingly and evenly across the board. If you’re working with small pieces of wood, consider using double-sided tape instead of clamps.
Once everything is secure, check again that your material is aligned correctly and won’t move during routing. Doing so will guarantee clean cuts with precise measurements every time! Having confidence in the security of your material makes for an enjoyable router experience because you know mistakes are less likely to happen.
So make sure all materials are securely aligned before starting any project—it’ll make the difference between success and failure! With this foundation in place, you’ll be ready to make a plunge cut without worry or hesitation.
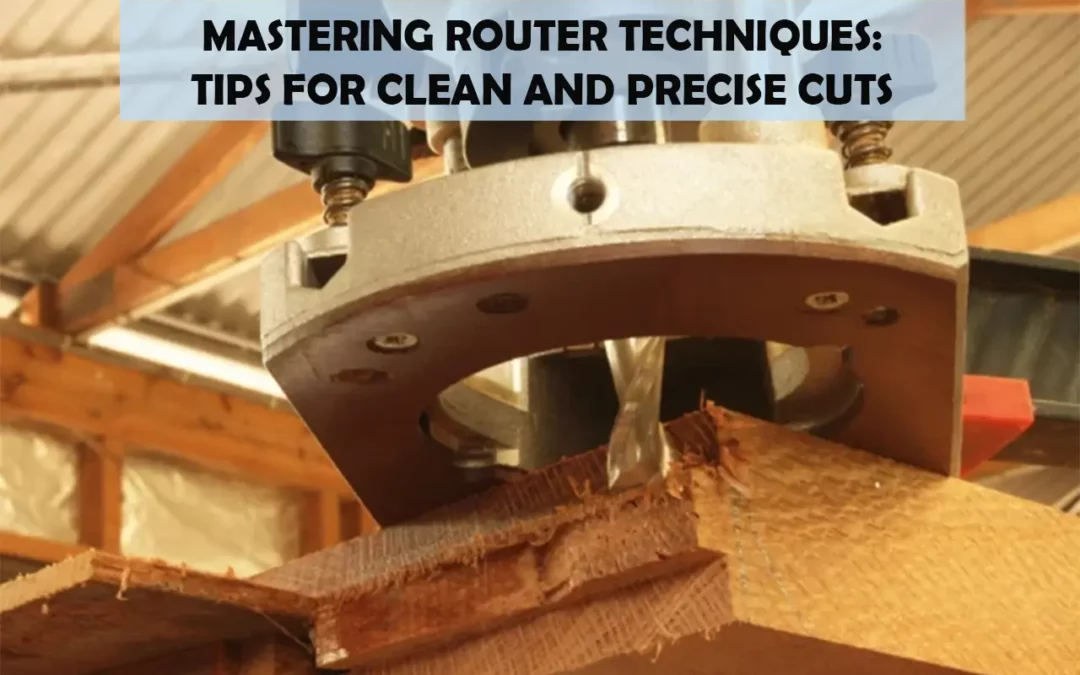
Make a Plunge Cut
Plunging into a project with your router can be an intimidating experience, but once you get the hang of it, it’ll become second nature!
To make a plunge cut:nn1. Calibrate the depth of the router bit for consistent results.nn2. Adjust the speed to match your material’s thickness and texture.nn3. Position the wood securely in place before starting the cut.nn4. Ensure that you keep your hands away from the cutting area at all times while operating your router.
When making a plunge cut, it’s essential to maintain a steady speed throughout as that’ll give you cleaner lines and more precise cuts – no jerking or sudden movements! Make sure to use appropriate safety equipment such as protective eyewear and gloves when working with routers and always double-check that all clamps are properly secured before beginning any work.
Taking care of these simple steps will help ensure successful plunge cuts each time you use your router! With these tips in mind, you’re now ready to move on to maintaining a steady speed during your routing projects.
Maintain a Steady Speed
When mastering router techniques, it’s important to maintain a steady speed for clean and precise cuts. To do this, use a push block to steady the material as you cut, and make sure to wear a dust mask for protection against any wood particles that may fly up.
With these steps in place, you’ll be able to make your cuts with ease and accuracy.
Use a push block to steady the material
Hold the push block firmly against the material as you make your cut for a steady, precise result. To ensure accuracy in your results, adjust the pressure of the block so that it’s snug against the material. This will provide more depth control and help to keep your cut consistent along its entire length.
Additionally, be consistent with your speed when cutting as this will also help you to achieve a clean and precise line. When finished, don’t forget to put on a dust mask for protection from particles created by the router or any other woodworking tools you may use.
Taking these steps can help you master router techniques for cleaner and more accurate cuts – making sure that each project is of superior quality!
Use a dust mask for protection
With proper safety measures, donning a dust mask will protect you from wood particles created while using the router. It’s important to wear goggles and double-check the depth of your cuts for the best results.
Here are some key things to consider when using a dust mask:
- Comfort:
- Choose a snug-fitting yet breathable mask.
- Use adjustable straps for a personalized fit.
- Protection:
- Look for masks with a high filtration rate against dust particles.
- Replace filters regularly for maximum protection.
By following these tips, you can ensure that your router work is safe and precise. Invest in quality materials and take all necessary precautions to prevent any potential harm to yourself or others around you.
Conclusion
In conclusion, mastering router techniques takes practice and patience. By following these tips, you can make clean and precise cuts that will help you create professional-looking pieces.
It’s worth noting that even the most experienced woodworkers can make mistakes when using a router. One study found that nearly half of all router-related accidents happen to people who’ve been using the tool for more than five years. However, with proper safety precautions and attention to detail, you can confidently use your router to bring your projects to life.
Frequently Asked Questions
How do I clean my router bit?
You can keep your router bit clean by following a few simple steps. Begin by ensuring dust control and proper bit care, such as cleaning the bit regularly with compressed air. As an example, think of the bit like a fine-toothed comb: if you don’t properly care for it, it won’t function optimally. Keep it finely tuned and ready to cut precise edges every time.
Is it necessary to use a router table for precise cuts?
Yes, a router table is necessary for precise cuts. It helps control speed and dust collection, making the cut cleaner and more accurate. With its stability, it can help you achieve great results with less effort.
What is the best way to practice router-cutting techniques?
Do you want to perfect your router-cutting techniques? Start by practicing drilling techniques and mortise joints, then build your way up. Try out different shapes and sizes of cuts for precision, and don’t forget to be precise and accurate with each one. With practice comes mastery!
How often should I sharpen my router bit?
Sharpen your router bit when it starts to show signs of wear. For best results, select a good quality bit and take proper care of it. Check for damage and dullness regularly, and sharpen it as needed.
What safety measures should I take when using a router?
Always wear proper attire when using a router: safety goggles, hearing protection, dust mask, and closed-toe shoes. Ensure your router is properly maintained; check for loose screws or parts that need replacement. Follow instructions carefully to avoid injury.