As a woodworkers, you know that the success of a project lies in the details. Every cut must be precise, and every measurement needs to be exact. But how do you ensure accuracy without the right marking techniques? Like any craftsperson, choosing the most suitable tool for each job is essential to achieving your desired results.
From pencils to measuring tapes and everything in between, there’s no shortage of options when it comes to finding the perfect marking technique for your project. With a little research and some practice, you can master these skills and create projects with professional-level precision.
Key Takeaways
- Consider accuracy, ease of use, cost-effectiveness, and the type of material when choosing a marking technique for woodworking projects.
- Pencils are commonly used for basic layout work due to their precision and versatility.
- Markers offer more control over precision and come in various colors.
- Chalk lines are useful for drawing straight lines without individual marking.
Types of Marking Techniques
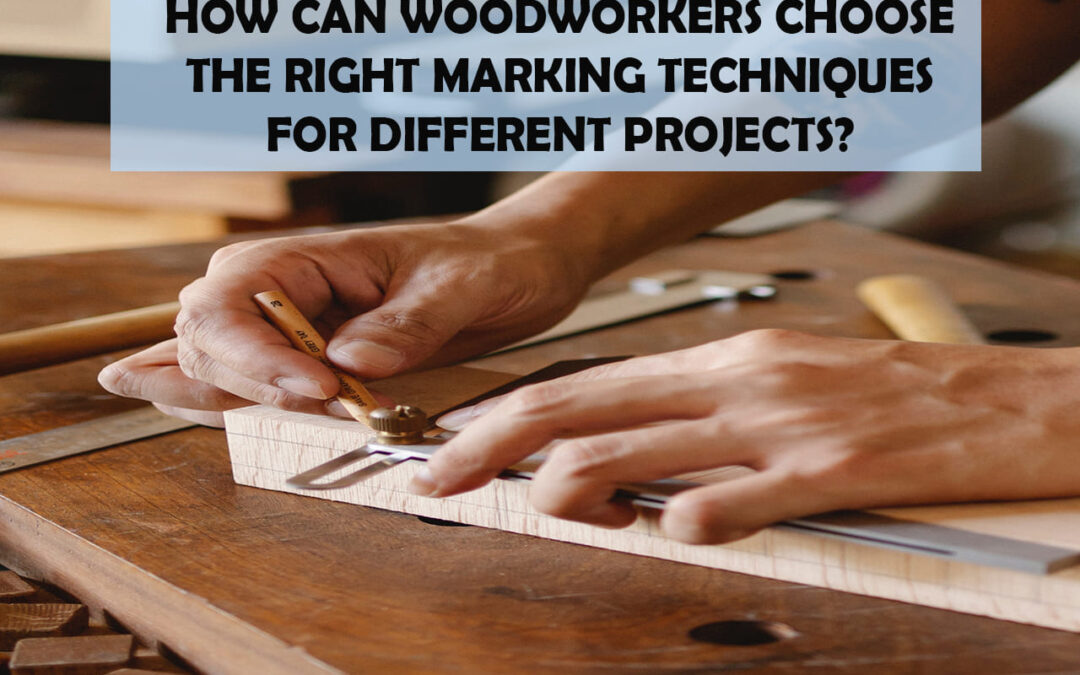
You need to choose the right marking technique for your project, so you can make sure it looks its best! Marking techniques are essential for woodworking projects as they create templates that will guide the accuracy of the cuts and ensure a professional finish.
There are several types of marking techniques available to woodworkers, such as using pencils, markers, chalk lines, punches, scribes, and template guides.
Pencils are one of the most commonly used marking tools in woodworking and they’re great for basic layout work. They’re convenient because they require no special preparation and have a wide range of colors available.
Markers offer more control over precision than pencils and come in many different colors to help distinguish between marks.
Chalk lines provide an easy way to draw straight lines without drawing out each step individually with a pencil or marker.
Punches allow you to accurately mark holes in your material without having to measure each one separately.
Scribes give you more control when etching into materials, while template guides make creating templates easier by allowing you to quickly trace shapes onto materials.
When selecting a marking technique for your project, several factors must be considered including accuracy, ease of use, and cost-effectiveness. Different projects may require different levels of precision, so it’s important to choose the appropriate tool for the job at hand. Additionally, some tools may be more expensive than others but may provide better results in terms of accuracy or speed, which should also be taken into account when choosing the right tool for your project.
The type of material being worked with is another factor that needs consideration when selecting a marking technique as some materials may require specific tools such as scribes or punches, which can only work on certain surfaces like metals or hardwoods. With this in mind, it’s important to do research ahead of time about what works best with each particular material before starting any project so you can get the desired results that look great every time!
Factors to Consider When Choosing the Right Marking Technique
When considering a project, it’s important to take into account the various factors that can help determine which marking technique is most suitable. Precision accuracy, grain direction, and finish aesthetics – all these should be taken into consideration when selecting a marking technique.
For example, sawing may be necessary for precision accuracy, while routing or carving may be more suitable for achieving intricate details. It’s also important to consider the grain direction of the wood when deciding on which method to use.
If a smooth finish is desired, then sanding may be appropriate as it can create an even surface and provide a clean aesthetic. Alternatively, if a rustic look is desired, then planing could create this effect without damaging the wood too much.
Ultimately, each type of marking technique has its advantages and disadvantages that should be weighed before making any decisions to achieve the best results. As such, understanding how different techniques work for your project will give you greater control over its outcome and enable you to make informed choices about what works best for you.
Picking the right tool for the job will ensure that your project turns out exactly as desired with minimal effort needed from start to completion.
Pencils
Pencils have long been a go-to tool for woodworkers, providing an easy and versatile way to sketch ideas with lightning speed, like etching a drawing into the wood’s surface. They are ideal for exploring different designs on the wood before committing to a specific plan. Here are three reasons why pencils should be considered when choosing marking techniques:
- Pencils can be used to make precise marks with great accuracy. This is especially helpful when selecting saw blades or determining the exact placement of stains and finishes.
- Pencil markings won’t damage the wood as they can easily be removed with sandpaper or steel wool if needed.
- Using pencils allows the user to see what their design will look like in various lights before actually cutting or staining the wood, allowing them more control over how their project turns out.
Pencils provide a great alternative to more permanent marking techniques such as chisels and markers, allowing users to explore different options without worrying about making mistakes that can’t be undone later on in the process. Plus, since pencils are relatively inexpensive and widely available, they make it easy for anyone interested in trying out this technique without having to invest too much money upfront.
Moving forward from here, marking gauges are another option that should also be explored by those looking for even more precision in their projects.
Marking Gauges
For those looking to take their woodworking projects to the next level, marking gauges are a great way to ensure accuracy and precision.
Marking gauges come in two main varieties: those with engraving pins and those with chisel markers. The engraving pin variety is meant for use on soft materials like pine or cedar. When using this type of gauge, it’s important to carefully measure the area that needs to be marked to maintain accuracy.
For harder materials like oak or walnut, the more precise chisel markers are preferred. These gauges have a bit that comes into contact with the material as it’s being marked, allowing for greater precision when making cuts or drilling holes.
With either style of marking gauge, ensuring accuracy is paramount for woodworkers who want their projects to look professional and polished. Making sure not only that measurements are accurate but also that each piece is consistently sized makes all the difference in how a project turns out.
Transitioning from one piece of wood to another without any irregularities helps create an overall even aesthetic when finished. With marking gauges, woodworkers can feel confident knowing they’ve chosen a reliable tool capable of helping them achieve success on their projects every time.
Layout Knives
Layout knives are essential for any woodworker to craft precise cuts and ensure accuracy in their projects. But what exactly is a layout knife? It’s a sharp-edged tool comprised of a blade, handle, and guard that functions by cutting into the wood surface.
This marking tool allows for intricate and accurate details to be etched into the material before it is cut. In addition to making straight lines, layout knives can also be used with sandpaper marking or pyrography burning techniques for more detailed designs.
Safety should always be the top priority when using layout knives as they can cause serious injury if handled incorrectly. With proper safety measures such as wearing protective gear like gloves and goggles, woodworkers can use them safely without worry. Additionally, honing the blade regularly will keep it sharpened so that it produces clean and accurate cuts in the material every time.
No matter how meticulous you are in your measurements or careful you are when measuring out lines, having an accurate tool is paramount for success in any project. With its versatility to create specialized details on different materials, a layout knife is an ideal choice for any woodworking task at hand – from basic markings to complex carvings. Making sure your blade remains sharp will help you achieve professional results each time you use it!
Moving on try squares now…
Try Squares
Try squares are essential tools for accurate woodworking, allowing crafters to create precise cuts and ensure their projects turn out perfectly. They allow woodworkers to easily mark 90-degree angles on the edges of boards or other pieces of material, making it easy to join them together in a perfect miter joint.
Try squares are also used to mark perpendicular lines across the faces of boards when using hand planes or miter boxes.
When purchasing a try square, look for one with an adjustable blade that’s been accurately machined and calibrated so it’s set at exactly 90 degrees. The handle should also be ergonomically designed for comfort during use and have a suitable grip without being too heavy or cumbersome. A good quality try square will last many years with proper care and maintenance.
Try squares are invaluable tools when cutting miters for frames or other projects that require straight lines. They can also be used as depth gauges for measuring how much material needs to be removed when planing surfaces or creating rabbets and dadoes in stock material. With a try square, woodworkers can make sure all their pieces fit together perfectly and create beautiful finished products every time they use them.
By taking the time to choose the best tool for the job, woodworkers can confidently rely on try squares when laying out their projects with precision and accuracy every time they use it. With this valuable tool by their side, no project is too difficult! Smooth transitions into different cuts along edges will result in clean lines that look great in any finished product.
Chalk Lines
Chalk lines are a handy tool for quickly and easily creating straight lines, saving woodworkers time and effort when marking out projects. It’s easy to activate the chalk by shaking it up in the container so that it’ll adhere to surfaces when applied.
The chalk comes in a variety of colors and can be blended to create new shades, making it possible to customize markings. Applying the chalk is straightforward – simply draw along the line with the tip of the container for even coverage. To ensure accuracy, measure twice before applying the chalk.
Removing a mistake is as simple as wiping it away with a damp cloth or light sandpaper if necessary.
After applying the chalk line, use a ruler or a square to check for accuracy before proceeding with cutting or other tasks. This step ensures that no errors have been made throughout the process, leading to better results overall.
The flexible nature of this tool also allows woodworkers to mark curved lines without any extra effort or special tools required. With proper care and storage, chalk lines can be reused multiple times before needing replacement – meaning they offer great value for money too!
As a bonus, clean-up takes just seconds meaning little disruption to your workflow routine.
Marking Dyes
Marking dyes offer a unique and easy way to create clear, permanent markings on wood projects. They come in liquid form and are applied by brush or pen. Dyes can be used for a variety of purposes, including engraving, outlining details, and wood burning.
The advantages of marking dyes include:
- They’re easy to control – they produce precise lines that can be used for detailed work.
- They’re cost-effective – they’re inexpensive compared to other marking techniques.
- They’re permanent – the colors remain vibrant even after exposure to sunlight or moisture.
The disadvantages of marking dyes include:
- They’re time-consuming – they take longer to apply than other methods such as chalk lines and tape measures.
- They have limited color options – most brands only offer a few colors, so you may not be able to find the exact hue you’re looking for.
- They’re difficult to remove – if mistakes are made, it is difficult to remove the dye without damaging the wood surface.
Overall, marking dyes provide a great way to mark intricate designs onto wood projects with accuracy and permanence. With some practice and patience, these tools can help any woodworker achieve professional-looking results in their work.
Moving on from here, measuring tapes provide another helpful tool when planning out wooden structures or furniture pieces accurately with precision cuts.
Measuring Tapes
Measuring tapes are essential for woodworking, as they help you cut your materials to the exact size and shape you need – like a craftsman carefully measuring and cutting fabric for a tailored suit.
From the small markings on lumber to large projects like furniture builds, it’s important to get measurements right. A quality measuring tape is one of the most important tools in any woodworker’s kit.
Measuring tapes come in many different lengths, widths, and styles, so it’s important to select one that fits your needs. The longer ones are best for larger projects, while shorter tapes can be used for smaller jobs.
It’s also important to choose a tape with power tools or sandpaper grit information printed on it; this will help you stay organized when working with different materials.
When choosing a measuring tape, make sure it has durable construction with an easy-to-read scale. Metal tapes are usually more accurate than plastic ones and can withstand wear better over time.
Look for features such as anti-slip surfaces, locking mechanisms, and ergonomic handles that’ll make it easier to use both indoors and outdoors. Lastly, look into purchasing additional accessories such as belt clips or retractable reels, which provide extra convenience when working on projects away from your workbench or garage.
With these tips in mind, you’ll be able to find the perfect measuring tape for all your woodworking needs!
Conclusion
Wrapping up, there are several marking techniques to choose from when it comes to woodworking projects; each with its unique advantages and disadvantages. Consider the type of project you’re working on, as well as your skill level, before making a decision.
Pencils, marking gauges, layout knives, try squares, chalk lines, and marking dyes can all be helpful tools for getting the job done right. So don’t hesitate – grab your tools and get to work! With a little patience and practice, you’ll be able to craft beautiful projects that’ll last for years.
Frequently Asked Questions
How much do the different marking techniques cost?
Comparing the costs of various marking techniques is important. Durability testing can help you determine the right choice for your project. Prices will vary, so be sure to shop around and assess quality before making a decision.
Are there any safety tips to consider when using marking techniques?
Yes! To ensure marking accuracy and safety, always wear protective gear and keep tools sharp. Always focus on the task at hand, avoid distractions, and use a clamp or vice when cutting. Ensure your work area is well-lit and that you have proper footing. Lastly, test the marking technique on scrap wood before using it for the project.
What materials work best with each marking technique?
When differentiating marks and comparing techniques, understand which materials work best for each. Harder surfaces require sharper marking tools while softer woods need a duller instrument. Keep safety in mind when selecting the right technique.
Is there a way to tell which marking technique is best for a particular project?
Yes! Woodworking tools give you the accuracy to choose the perfect marking technique for any project. With the right tools, you can make sure your markings are precise and accurate every time. Exaggerate your results with confidence – you got this!
How can I tell when a marking technique is no longer accurate?
You can tell when a marking technique is no longer accurate by checking the accuracy of your markings. Compare the results to your desired outcome, and adjust or switch techniques if necessary.