Imagine stepping into a workshop, surrounded by the rich scent of sawdust and the sound of tools buzzing with purpose. You feel a sense of anticipation as you pick up a wood marking tool, knowing that it holds the power to transform a simple piece of lumber into something extraordinary.
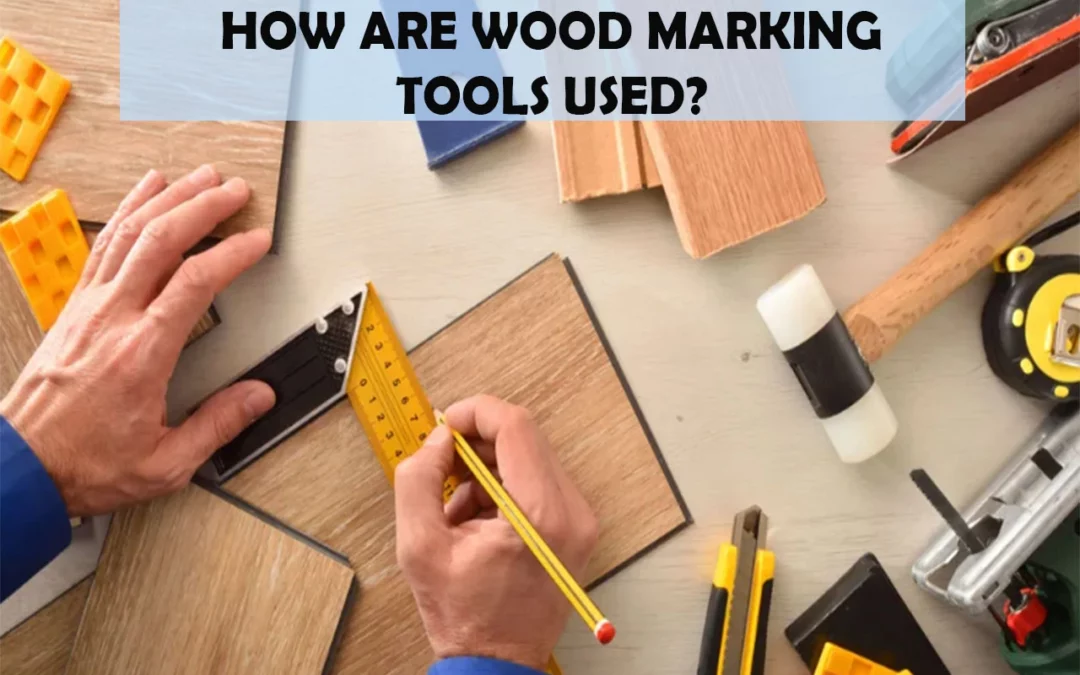
These tools are like artists’ brushes, allowing you to make precise markings that guide your every cut and shape. From measuring tapes that ensure accuracy in lengths and distances to marking gauges that create crisp lines on wood, each tool plays a vital role in bringing your vision to life.
With chalk lines, you can effortlessly create straight lines over long distances, while carpenter’s pencils leave clear marks for cutting and shaping. Awls provide starter holes for nails or screws, ensuring that they go exactly where they need to be. Combination squares become your trusted companion for measuring angles on wood with utmost precision.
In this article, we delve into the world of wood marking tools – their uses, techniques, and how they enhance your woodworking experience. So grab your favorite tool and let’s embark on this journey together!
Key Takeaways
- Wood marking tools, such as brushes, measuring tapes, marking gauges, chalk lines, carpenter’s pencils, awls, and combination squares, are essential for accurate measurements, precise markings, and creating well-fitted joints in woodworking projects.
- Measuring tapes offer flexibility for measuring curved surfaces or irregular shapes while marking gauges create precise lines and markings on wood for accurate cuts and joints.
- Chalk lines allow for precise marking and making straight lines over long distances, and carpenter’s pencils are designed for marking wood with their wider lead for visibility.
- Awls are used to create starter holes for nails or screws to prevent the wood from splitting, and combination squares help accurately measure and mark angles in woodworking to avoid misaligned joints, gaps, and uneven surfaces.
Measuring Tapes: Accurately Measure Lengths and Distances
Measuring tapes help you accurately measure lengths and distances, allowing you to visualize and plan your woodwork projects with precision. They are essential tools for any woodworking enthusiast or professional.
While there are other measuring tape alternatives available, such as rulers and yardsticks, measuring tapes offer the advantage of flexibility, making it easier to measure curved surfaces or irregular shapes.
There are different types of measuring tapes that cater to various needs. For example, retractable steel tapes are commonly used due to their durability and ease of use. They have a locking mechanism that allows you to secure the tape at a desired length. Another type is the cloth tape measure, which is more flexible and ideal for measuring fabric or soft materials.
To use a measuring tape effectively, start by hooking the end onto one point of what you want to measure. Then extend the tape along the surface until you reach the endpoint. Read the measurement on the tape where it aligns with the other edge.
Marking gauges create precise lines and markings on wood, ensuring accurate cuts and joints in woodworking projects. These tools allow you to make consistent measurements throughout your workpiece.
Marking Gauges: Create Precise Lines and Markings on Wood
Craftsmen rely on marking gauges to effortlessly etch accurate lines and intricate patterns into their wooden creations. These tools are essential for creating intricate designs that require precision and attention to detail.
Marking gauges consist of a fence or beam that slides along the edge of the wood, allowing you to set the desired distance from the edge and lock it in place. The gauge also has a sharp cutting wheel or spur that can be adjusted to different depths.
To use a marking gauge, start by setting the desired measurement on the fence using a ruler or measuring tape. Then, glide the gauge along the surface of the wood, applying gentle pressure to create a shallow groove or line. This technique ensures consistent markings throughout your project.
Experienced craftsmen often employ various techniques when using marking gauges. For straight lines, they may lock the gauge’s fence against a straightedge or use it as a guide for cutting with other tools like chisels or saws. When creating intricate designs, craftsmen may pivot the gauge’s cutting wheel while following curved lines traced onto their workpieces.
Transitioning into chalk lines: make straight lines over long distances…
Chalk Lines: Make Straight Lines Over Long Distances
Transitioning into the topic of chalk lines, you can easily create straight lines over long distances using this ingenious tool. Using chalk lines in woodworking offers numerous benefits that can greatly enhance your woodworking projects.
Here are four key advantages of using chalk lines:
- Precision: Chalk lines allow for precise marking, ensuring accurate measurements and cuts on your wood. By simply snapping the line against the surface, you can create a clear and prominent mark to guide your work.
- Long-distance marking: Unlike other marking tools, chalk lines enable you to make straight lines over significant distances. This is especially useful when working on larger projects or when aligning multiple pieces of wood.
- Versatility: Chalk lines can be used on various surfaces such as wood, metal, concrete, or even fabric. This versatility makes them an essential tool in any woodworking arsenal.
- Easy cleanup: Chalk marks are temporary and easily removable. The excess chalk dust can be brushed away effortlessly once you’re done with your project.
With these benefits in mind, it’s clear why utilizing chalk lines in woodworking is advantageous.
Transitioning into the subsequent section about carpenter’s pencils allows us to explore another essential tool for marking wood without missing a beat.
Carpenter’s Pencils: Mark Wood for Cutting and Shaping
To make precise cuts and shapes in your woodworking projects, you’ll want to grab a carpenter’s pencil – it’s the perfect tool for accurately outlining your designs.
Carpenter’s pencils are specifically designed for marking wood and come in various types. The most common type is rectangular with flat sides, allowing for a comfortable grip. They also have a lead that’s wider than traditional pencils, making it easier to see the lines on wood surfaces.
When using a carpenter’s pencil, it’s crucial to sharpen it correctly. Unlike regular pencils, carpenter’s pencils need to be sharpened differently. Start by removing the wooden casing with a knife or sandpaper until you expose the lead fully. Then, use a utility knife or specialized sharpener to shape the lead into a chisel point. This point helps create clean and accurate lines on the wood.
Carpenter’s pencils have various uses in woodworking projects. They can be used to mark measurements, outline joints, and indicate where cuts should be made. Additionally, they’re handy for transferring measurements between different pieces of wood.
Now that you know how useful carpenter’s pencils can be in marking wood accurately, let’s move on to learning about another essential tool: awls. Awls allow you to create starter holes for nails or screws, ensuring precision and preventing wood from splitting during installation.
Awls: Create Starter Holes for Nails or Screws
Awls are like tiny precision drills, gently piercing the surface of your material to create a small indentation for nails or screws. They come in different types and each has its own specific use in woodworking.
Here are some discussion ideas about awls in woodworking:
- Different types of awls and their uses:
- Scratch Awl: Used for marking lines on wood.
- Brad Awl: Designed for starting small holes for nails.
- Gimlet Awl: Ideal for creating pilot holes for screws.
- Tips and techniques for using an awl effectively:
- Hold the awl firmly but without applying excessive pressure.
- Position the awl at a slight angle to ensure accuracy.
- Use a mallet when working with harder materials.
- Practice on scrap wood before working on your actual project.
Awls are essential tools in woodworking, allowing you to make precise indentations that guide your fasteners into place. Once you’ve created these starter holes with an awl, you can move on to using combination squares to measure and mark angles on wood.
Combination Squares: Measure and Mark Angles on Wood
Combination squares are versatile instruments that accurately measure and indicate angles in woodworking. They consist of a ruler and a headstock with an adjustable blade that can be set at different angles.
Measuring and marking angles with combination squares is crucial in woodworking because precision is key to creating well-fitted joints and ensuring the overall quality of the finished product.
To measure an angle using a combination square, you simply position the headstock against one edge of the wood and adjust the blade until it aligns perfectly with the desired angle. The ruler on the square provides accurate measurements, allowing you to mark the angle precisely on your workpiece. This ensures that all pieces fit together seamlessly, resulting in sturdy joints and professional-looking projects.
Precision is essential in woodworking because even a small deviation from the intended angle can compromise the structural integrity of your piece. It can lead to misaligned joints, gaps between pieces, or uneven surfaces. By using combination squares to measure and mark angles accurately, you can avoid these issues and achieve precise results every time.
Combination squares are invaluable tools for measuring and marking angles in woodworking. Their accuracy allows craftsmen to create tight-fitting joints and produce high-quality projects. Remember, precision is key when working with wood, so make sure to use combination squares for accurate measurements every step of the way.
Conclusion
In conclusion, wood marking tools are essential for accurate and precise woodworking projects. By using measuring tapes, marking gauges, chalk lines, carpenter’s pencils, awls, and combination squares, you can ensure that your measurements and markings are spot on.
As the saying goes, “Measure twice, cut once.” This adage reminds us of the importance of careful planning and attention to detail in order to achieve excellent results.
So next time you embark on a woodworking project, remember to rely on these versatile tools to guide you every step of the way
Frequently Asked Questions
What are some common maintenance tips for wood marking tools?
To maintain wood marking tools, follow these best practices: regularly clean the tools with a soft cloth, keep them dry to prevent rust, store them in a cool and dry place, sharpen blades when necessary.
Are there any safety precautions to keep in mind when using wood marking tools?
When using wood marking tools, it is crucial to prioritize safety measures. Always wear protective gear like goggles and gloves. Ensure proper technique by holding the tool firmly and using controlled movements to avoid accidents.
Can wood marking tools be used on other materials besides wood?
Wood marking tools can be used on other materials besides wood. Metal marking techniques involve using special metal markers or engraving tools, while textile marking methods use fabric markers or stencils to create designs on fabrics.
How do I choose the right wood marking tool for my project?
To choose the right wood marking tool for your project, consider the type of woodworking you’re doing and the desired level of precision. There are various types, including pencils, marking knives, and chisels, each serving a specific purpose.
Are there any alternative methods to achieve similar results without using wood marking tools?
To achieve similar results without wood marking tools, you can try alternative methods like using a pencil or chalk to mark the wood. These methods allow for precision and accuracy in achieving your desired markings.