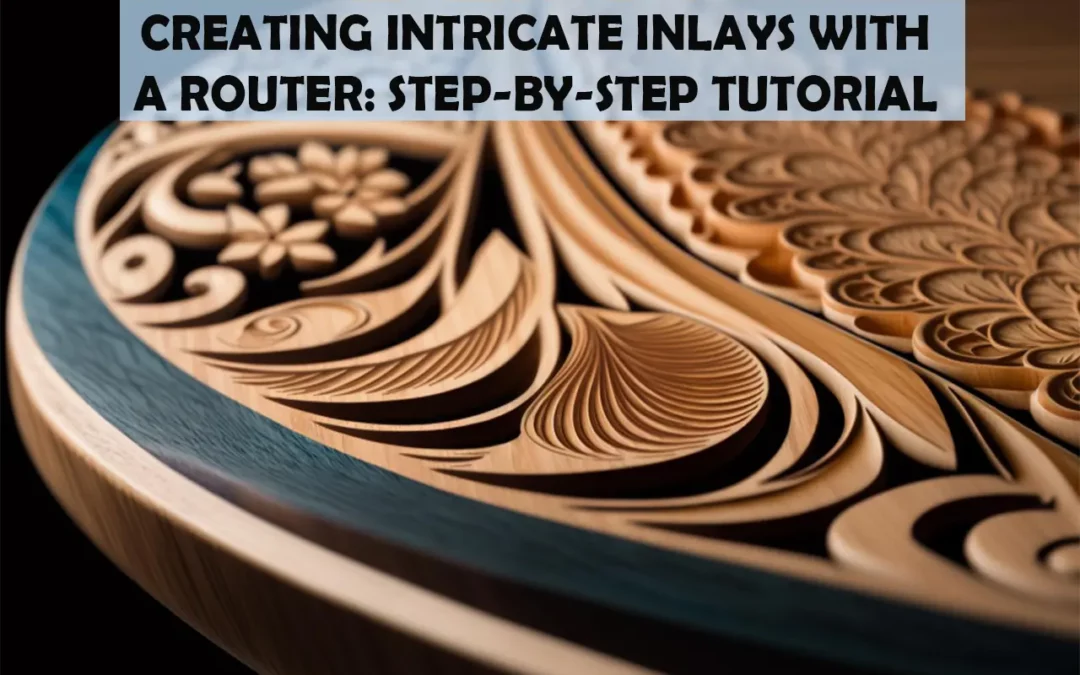
Have you ever wanted to add a touch of elegance to your woodworking project? Creating intricate inlays with a router is the perfect way to do just that. From designing and cutting pieces to assembling and installing, this step-by-step tutorial will guide you through the entire process.
You’ll be amazed at how quickly and easily you can craft something truly special. With these techniques, you’ll be able to transform any piece of wood into a work of art that will last for generations.
So don’t delay – start creating beautiful inlays today!
Key Takeaways
- Inlays can enhance woodworking projects with intricate designs created using a router.
- Accuracy is crucial when designing, cutting, and assembling inlay pieces.
- The inlay should be carefully finished with wood stain, sanding, and an oil-based sealer.
- Installation of the inlay should be done with attention to detail and proper tools.
Gather the Necessary Materials
Gather up all the materials you’ll need to create your inlay so you’re ready to get started! Start by selecting the type of wood for your project. You’ll want to choose a hardwood such as walnut or maple that can withstand the depth and pressure of a router bit. Also, select any specific woods for multi-colored inlays which will be cut out with a jigsaw and glued into place later on.
Additionally, make sure you have plenty of router bits on hand to achieve different shapes and depths within your design. Don’t forget extra safety equipment like goggles, gloves, and dust masks if needed when working with power tools! Finally, be sure to have some scrap wood pieces around so that you can practice making cuts before committing them to the final project. This is an important step in creating intricate inlays with a router since it allows you to refine your technique before cutting into the main piece of wood.
With everything gathered together, you’re now ready to move on and prepare the wood surface for carving.
Prepare the Wood Surface
Before you get started on your project, make sure the wood surface is ready by sanding it smooth. Start with a medium-grit sandpaper and progress to a fine-grit paper to create a smooth finish on the wood. Make sure to pay special attention to any raised grain as this can affect the overall look of the inlay when it’s complete.
When choosing your wood selection for the inlay, you’ll want to consider contrasting colors and grain matching so that each piece provides an aesthetically pleasing combination when they’re put together. It’s important to take into account both color and texture for each piece for them to blend seamlessly into one another.
Accuracy is key When cutting out wood for an intricate inlay pattern! With precision, cuts comes effective grain matching – making sure all edges line up perfectly so that there are no gaps or inconsistencies between pieces. After cutting out each piece, double-check all measurements with a ruler before gluing them together or routing them down further. This step will ensure that everything lines up exactly how it should once be completed and makes creating complex patterns much easier! By taking extra care during your preparation stage, you can ensure beautiful results in the final product without having any errors or misalignments due to improper preparation.
With all pieces prepared and cut out accordingly, you’re now ready to design your desired inlay pattern! The next step is figuring out exactly what kind of shape or pattern you’d like your finished product to be; whether it’s geometric shapes like circles or squares; organic patterns such as flowers or leaves; or even something more abstract like waves – whatever it may be, just remember that accuracy is essential throughout this entire process!
Design the Inlay Pattern
Now that you have all the pieces ready, it’s time to design the inlay pattern of your dreams! Before making any cuts, you need to carefully measure and mark each piece for accuracy. You must also determine what material you’ll use for the inlay – wood, metal, or other materials.
Here are a few things to keep in mind when designing your inlay:
- Choose dimensions that fit within the surface area you’re working with.
- Select materials that match or complement one another.
- Consider unique shapes and patterns to create a stunning design.
- Incorporate special details such as symbols or logos to make it truly unique.
Once you’ve decided on your desired look and feel, use a pencil or marker to trace out your pattern on each piece of wood. Make sure to accurately transfer all measurements from one piece of wood onto the others. To ensure everything lines up properly, double-check all measurements before moving on to the next step.
Now it’s time to cut out your beautiful new inlay pieces!
Cut the Inlay Pieces
Cutting the inlay pieces is an important part of creating a beautiful, intricate design, so make sure to take your time and do it right!
Start by preparing the router table with a fence that’ll help guide you as you cut. Set your router bit at the desired cutting angle and adjust the height so it’s level with the surface of the wood.
Once everything is set up, place each piece of wood into position on the router table and use a push stick to move it through steadily. Make sure to check for accuracy after each pass; small adjustments may be necessary if there are any discrepancies.
For more complex patterns, you’ll need to adjust both the cutting angles and router settings for best results. If possible, practice on scrap wood first so you understand how different settings affect cuts before tackling your real project.
When making multiple cuts with similar angles or depths, mark them off on paper first so all pieces are consistent in size and shape when finished.
Above all else, pay attention to safety throughout this process: wear protective eyewear and gloves, keep hands away from spinning blades during operation, and turn off power before changing bits or cleaning up debris – these precautions shouldn’t be overlooked!
With proper preparation and care taken while cutting your inlay pieces, you can ensure a successful project with stunning results. Now it’s time to prepare those pieces for installation – let’s get started!
Prepare the Inlay Pieces
Once the pieces have been cut, it’s time to get them ready for installation. Let’s get started!
The first step is selecting a wood that will match the rest of the project. This could be anything from hardwood like maple or walnut to softer woods like pine or cedar. Depending on the size of your project, you might want to use different types of wood for different parts.
Next, you’ll need to sand down all edges and corners of each piece so they fit perfectly when glued together. Use an orbital sander with fine grit paper (120-180) for the best results. Make sure every edge and corner is as smooth as possible. If you don’t have an orbital sander, you can also hand sand using finer grit papers such as 220 or 320.
Finally, once all your pieces are prepped, we’re ready to glue them together and start creating our intricate inlays! But before gluing, take a moment to double-check that all pieces fit correctly and that there aren’t any gaps left between them before moving on to the next step.
With everything in place, we can now move on confidently without having any surprises later on down the line!
Glue the Pieces Together
To finish the inlay process, it’s time to glue the pieces together with a strong adhesive. Start by selecting an appropriate glue, such as wood, epoxy, or polyurethane. All of these options will provide a long-lasting bond and won’t be affected by staining techniques.
Then, arrange your wood pieces into the desired pattern on a flat surface. Be sure that all of the edges line up correctly before adding any glue. If you’ve chosen an intricate design with small pieces, use tweezers for placement accuracy.
Once everything is arranged correctly, apply a thin layer of glue to each piece using a brush for even distribution. Then, press the parts firmly together until they’re completely bonded. Avoid putting too much pressure on the smaller pieces because they can easily break or shift out of place during this step.
Finally, leave your project to dry overnight in a dust-free environment at room temperature for optimal results. Make sure you select high-quality wood material when starting this process so that your finished product looks great and lasts for years to come! The quality of your selection plays a big role in how successful your outcome will be, so invest in good materials to ensure that no further steps are required later on.
With all these tips in mind, you’re now ready to move on to finishing the inlay!
Finishing the Inlay
Now that the pieces of your inlay are glued together securely, it’s time to move on to finishing. This step is critical and requires patience and precision.
Staining techniques can be used to color the inlay as desired, or you may choose to leave it natural. It’s important to use a good quality wood stain and apply it with a brush or lint-free cloth. Be sure to wipe off any excess stain after application.
Next, sanding methods must be employed carefully. Start with coarse grit paper that will remove any rough spots, then move gradually up the range until you reach extra-fine grit paper for a smooth finish.
Once complete, use an oil-based sealer designed specifically for wood surfaces to protect the inlay from moisture and wear over time.
An important task remains: installing your beautiful new inlay into its intended location!
Installing the Inlay
You must carefully install your inlay into its intended location, with an attention to detail that’ll leave it gleaming emotionally and visually.
To do so, you’ll need the following tools: a router, chisels, chisel guards, squares, and saws.
First, use the router to cut a groove for your inlay material. Then, use the squares to ensure that your grooves are even and level.
Next, place protective guards around each of your chisels and begin carving out any intricate details in the corners of the wood.
Finally, see along any lines or curves needed for intricate accents on the edges of your design.
Once done with all these steps, it’s time to glue down your inlay piece using wood glue and clamps. Make sure to press firmly until it’s securely set into place!
When finished installing your beautiful inlay piece, let it dry overnight before giving it a final polish with some sandpaper – that’ll bring out its natural luster and shine!
Conclusion
You’ve now created your stunning inlay with a router!
With the right materials, patience, and precision, you crafted something that looks like it was made by a professional. It’s almost too beautiful to believe – your new inlay is sure to be an eye-catching masterpiece that will last for generations!
Frequently Asked Questions
What type of router is best for creating inlays?
For precision routing and bit selection, a plunge router is your best bet. It offers great control and accuracy, making intricate inlays easy to create.
What kind of glue should be used for the inlay pieces?
When prepping wood and sanding edges for inlays, choosing the right glue is essential. A strong adhesive with good adhesion properties is ideal, such as epoxy or a polyurethane-based glue. Both provide excellent durability and stay flexible over time, making them perfect for intricate projects.
Is there a specific technique for routing the inlay pieces?
Yes, there is a specific technique for routing inlay pieces. You should adjust the router speed according to the complexity of your inlay design and make sure you cut slowly with steady pressure. This will help ensure an accurate cut and a good finish on the piece.
How long should the inlay pieces be allowed to dry before installation?
Choose the right wood and finishing techniques for your inlay pieces, then let them dry for at least 24 hours before installation. Suspenseful anticipation builds as you wait to see the results of your hard work!
Is there a way to make the inlay pieces more durable?
You can make your inlay pieces more durable by applying sealants and other finishing options. This will help protect the inlays from wear and tear, making them last longer.