Do you want to create smooth, glassy surfaces for your woodworking projects?
The smoothing plane is the perfect tool to help you achieve a professional-looking finish. It can be used to easily level out any imperfections on surfaces and make them look sleek and polished.
With the right knowledge and preparation, you can use a smoothing plane effectively and efficiently; avoiding common mistakes along the way.
Learn how to select the best type of plane for your needs, prepare it for use, operate it correctly, and clean and maintain it properly – all while creating a beautiful glassy surface.
Key Takeaways
- Smoothing planes are essential tools for creating smooth and polished surfaces in woodworking projects.
- Proper sharpening of the blade and regular maintenance of the plane is crucial for achieving glassy surfaces.
- Applying even pressure, using short strokes, and checking for burrs along the blade are important techniques when using a smoothing plane.
- To achieve the best results, start with light passes, take progressively lighter passes, and use sanding or buffing techniques for a smoother and glossier finish.
Overview of the Smoothing Plane
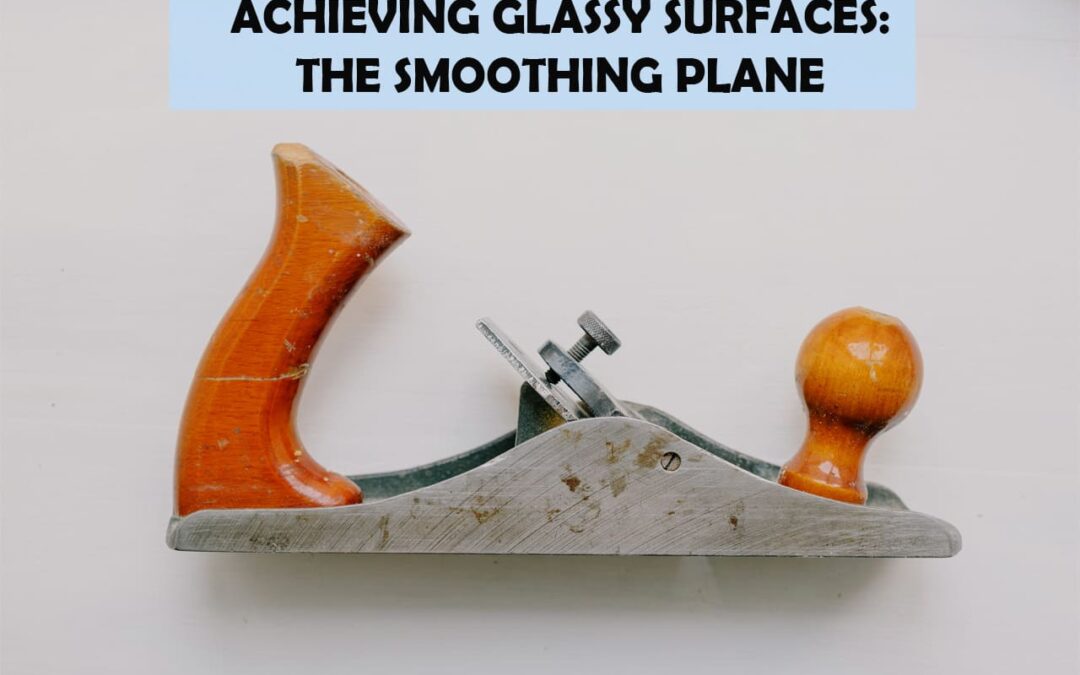
The smoothing plane is a tool that has the power to transform rough surfaces into glassy perfection. It’s an essential part of any woodworker’s arsenal, allowing for precise and fast corrections of edges, gentle curves, and flat surfaces.
Using sharpening techniques and careful plane selection, planing can be achieved quickly and precisely. In general, the smoother the surface after planing, the better it will look. Achieving a glass-like finish requires patience and practice. Each pass should be light yet firm to leave a consistent surface with no visible gouges or scratches.
The goal is to achieve a smooth-as-glass surface without having to resort to sanding or other abrasives. As each successive pass becomes more refined, use less pressure on the iron as you go—this will help prevent marring or chipping of the wood’s surface. With time and practice, you’ll soon know exactly how much pressure is necessary to achieve your desired results.
The right technique makes all the difference when it comes to using a smoothing plane; it takes finesse to get just the right amount of pressure for your workpiece to come out looking perfect every time. By developing good habits in terms of sharpening techniques and plane selection when starting on any project using a smoothing plane, you’ll find yourself creating amazing glassy surfaces with ease!
This knowledge provides an invaluable foundation as you strive for higher levels of craftsmanship in woodworking projects over time.
Types of Smoothing Planes
You’ve got a great project in mind and want to make sure the surfaces are smooth and perfect. To get those results, you’ll need the right type of smoothing plane.
There are several types of smoothing planes available, each with their features and advantages:
- Bevel-up Smoothing Plane: This type of plane has its bevel facing up for easier honing of blades when they need sharpening or adjustment.
- Adjustable Mouth Smoothing Plane: The mouth of this type can be adjusted to control the depth and width of cuts, making it ideal for creating different levels on wood surfaces.
- Low Angle Smoothing Plane: This is a specialized tool that is designed to cut at low angles which makes it better suited for finishing work than other planes.
- Adjustable Throat Smoothing Plane: This allows users to adjust the throat opening which helps them set the blade’s height while also allowing them to sharpen blades or adjust settings as needed without removing the blade from its body.
Each type provides unique benefits when trying to achieve glassy finishes on wood projects so it’s important to choose one that best fits your needs and skill level before beginning any project. By understanding how these planes work, you can ensure you have the right tools in hand before taking on any job or task. Taking some time upfront will save time in the long run as well as help guarantee quality results every time!
Benefits of a Smoothing Plane
Using a smoothing plane can offer amazing benefits for woodworking projects. It can improve accuracy and speed. For instance, research has found that using a smoothing plane can reduce the amount of time spent sanding by up to 70%. This not only improves efficiency but also gives your projects a finer finish than sanding alone can provide.
When selecting the right planer for your project, consider the size of the blade as well as any special features that may help you achieve better results. Additionally, proper sharpening of the blade is essential for achieving glassy surfaces. If not done properly, it can lead to imperfections in the finished material.
With these considerations in mind, one must prepare their plane for use with careful attention to detail. This includes cleaning and lubricating all parts before use to ensure smooth operation during cutting and planing operations. Additionally, make sure that each part is securely attached and adjusted correctly before starting work with any tool. Doing so will ensure optimal performance from your smoothing plane and help you achieve glassy surfaces on your woodworking projects efficiently and accurately.
Preparing the Plane for Use
Before you begin your project, take the time to properly prepare your plane for use. Sharpening the blades is essential for achieving a glassy surface. For best results, sharpen both sides of the blade with a honing stone or diamond file and then hone using a leather strop.
Once sharp, adjust the screws on either side of the blade so that it applies even pressure across its width when in use. Check this by running your finger along each side of the blade after adjusting – you should feel contact with an even amount of pressure on both sides. If not, continue to adjust until you do.
With these steps complete, you’re ready to start using your smoothing plane! When used correctly, it can produce highly polished surfaces without any visible tear-outs that would otherwise require sanding or filling to achieve perfection.
Using the Plane
Now that your plane’s properly prepared, it’s time to start using it for a perfect finish. To ensure the best results, use proper technique when operating the smoothing plane. The most important aspect of this technique is maintaining consistent sharpening angles throughout each stroke.
Here are five tips for achieving an expertly glassy surface:
- Hold the handle firmly and guide the blade with both hands.
- Apply even pressure throughout each stroke.
- Use short strokes to prevent mistakes.
- Take care not to press too hard on either end of the tool as this can cause gouging or uneven surfaces.
- Check for burrs along the blade regularly and sharpen when necessary.
When done correctly, these steps should provide you with consistently smooth surfaces every time. Paying attention to detail during each step will help create a beautiful finish without any major errors or mishaps along the way.
With a few practice runs, you’ll be able to master your smoothing plane in no time!
Avoiding Common Mistakes
Avoiding common mistakes while using a smoothing plane is essential for creating perfect results. To prevent airflow blockage, make sure that the sole of your plane is flat and free from dents or scratches.
The front edge should also be sharpened regularly to maintain an even cut depth across the entire board. Sandpaper grit can cause issues if it’s used too heavily or not changed often enough. Start by using coarse paper and gradually increase to finer grades until you achieve the desired finish.
When sanding, always keep the paper parallel with the grain of wood to avoid gouging or rippling. Finally, take extra care when removing shavings from your workpiece as they can clog up areas of the plane and cause damage over time.
With careful attention to these details, you’ll have no problem achieving glassy surfaces with your smoothing plane — smooth sailing into the subsequent section on removing it!
Removing the Plane
Once you’ve achieved the desired finish, it’s time to remove the plane. Refinishing techniques are important to consider when removing the plane to ensure that a glassy surface is attained:
- Sharpen the blades regularly for a clean cut.
- Use a low feed rate and small depth of cut.
- Make sure there isn’t any clogging on the blades.
- Adjust blade tension as needed during cutting.
When removing the plane, be sure that each pass makes minimal contact with the wood surface. This will help avoid any extra planing or sanding later. Additionally, use light pressure when running the blades over your workpiece. Doing so will reduce tear-out and provide a smoother finish. Taking care with sharpening and adjusting blade tension are also essential refinishing techniques for achieving a glassy surface.
Cleaning and maintaining your smoothing plane is an important step in preserving its quality and performance between projects.
Cleaning and Maintenance
Maintaining your plane is key to keeping it in top condition, so take the time to clean and sharpen it regularly.
After each use, wipe away any sawdust or debris with a damp cloth.
Periodically, you should also check for scratches or nicks on the blade surface that may accumulate over time.
To keep the blade sharp, use a fine-grit sharpening stone and polishing techniques such as stropping.
If needed, lubricate the joints of your plane using mineral oil before putting it away.
For best results, you should also periodically apply wax onto the surface of your plane.
This helps protect against corrosion and rust while providing an additional layer of shine and smoothness.
Applying wax can be done with a soft cloth after cleaning and polishing are complete – simply buff off any excess residue afterward for a glossy finish!
Taking these steps will ensure that your smoothing plane is always in good condition for achieving glassy surfaces.
Creating a Glassy Surface
Want to get that perfect, smooth finish? Wondering how to create a glossy surface with your plane? The key is in the technique.
Start by taking light passes with your planer and go slower than usual. This will help reduce the chipping and warping of the wood. As you progress, start taking progressively lighter passes until the surface tension has been evenly distributed across the entire piece.
Then use a polishing technique, such as sanding or buffing, to increase the glossiness of the surface. When using sandpaper, it’s best to use finer grits for a smoother finish. When buffing your piece, start with a medium-grit wheel and gradually move up to finer grits for maximum shine.
Remember that it’s important to be gentle when creating glassy surfaces; too much pressure can cause damage or leave scratches on your workpiece! With patience and some practice, you can achieve beautiful glassy surfaces that will stand out in any project.
Conclusion
You’ve now mastered the art of using a smoothing plane to achieve glassy surfaces. With practice, you’ll be able to take woodworking projects from rough shapes to beautiful finished pieces as smooth and reflective as a lake in the summertime.
Keep your plane clean and sharp for best results, and you’ll soon be crafting gorgeous projects like a pro.
Frequently Asked Questions
What type of surface is best suited for a Smoothing Plane?
For the best results, use a smooth wooden surface with sharpened blades when applying polishing techniques. This will ensure a high-quality, detailed-oriented finish.
Are there any special safety precautions to be taken when using a Smoothing Plane?
When using a smoothing plane, it’s important to take safety precautions. Wear protective gear and adjust the angle for ease of use. Be aware of the blades, which can cause injury if handled carelessly. Be knowledgeable and follow proper techniques for safe operation.
What is the best technique for achieving a glassy surface?
To achieve a glassy surface, lubricate the blades and reduce friction during use. Follow a skilled technique that pays attention to detail for the best results.
What is the difference between a Smoothing Plane and a Jack Plane?
You may be wondering what the difference is between a smoothing plane and a jack plane. On average, a jack plane removes twice as much material as a smoothing plane, making it ideal for quickly removing stock from wood selection. The more precise polishing strategies of the smoother plane produce glassy surfaces more effectively than its counterpart.
Is it possible to sharpen the blade of a Smoothing Plane?
Yes, it is possible to sharpen the blade of a smoothing plane. A honing technique or hand sharpening can be used to maintain its accuracy and precision. The blades should be regularly checked and sharpened for smooth cuts and finishes.